Difference between pages "File:Connected usb cables.jpg" and "DFNEXT Modem Installation"
Robert Howie (talk | contribs) |
Robert Howie (talk | contribs) |
||
| Line 1: | Line 1: | ||
| − | Connected usb cables | + | Slide bracket to the rightThe DFNEXT observatories usually ship without modems as many of them are deployed with WiFi or Ethernet connectivity and different areas of the world require different modems. |
| + | |||
| + | If you wish to network your DFNEXT observatory via mobile broadband instead of WiFi or Ethernet you need to source a modem and request a modem installation care package from [[Getting Help|DFN Camera Help]]. | ||
| + | |||
| + | The recommended modems are the [https://www.sierrawireless.com/-/media/iot/pdf/datasheets/sierrawireless_airprime_mc_series_datasheet.pdf Sierra Wireless AirPrime MC Series] MC7455 (for the Americas, Europe, the Middle East and Africa) and the MC7430 (for Asia Pacific including Australia). | ||
| + | |||
| + | = Installation Steps = | ||
| + | Once you have the modem, installation care package (containing the modem adaptor board, USB cable, modem bracket and screws) and a SIM card, you can install the modem by following the steps bellow. | ||
| + | [[File:Modem cable connector.jpg|none|thumb|Connect the modem USB cable to the modem.]] | ||
| + | [[File:Insert modem.jpg|none|thumb|Insert the modem into the adaptor board.]] | ||
| + | [[File:Fasten modem.jpg|none|thumb|Press modem down and fasten with the two small screws.]] | ||
| + | [[File:Insert sim.jpg|none|thumb|Insert the 2FF sized SIM into the spring loaded SIM card slot in the modem adaptor board.]] | ||
| + | [[File:Modem bracket.jpg|none|thumb|Take the modem bracket and two large screws.]] | ||
| + | [[File:Screw in modem bracket.jpg|none|thumb|Fasten the modem bracket using the two large screws and the threaded holes below the PCB.]] | ||
| + | [[File:Slide bracket to the right.jpg|none|thumb|Ensure the bracket is installed as far to the right as possible to allow the connector to clear the PCB standoff above the modem bracket.]] | ||
| + | [[File:Bend usb cable using hot air gun.jpg|none|thumb|Use a hot air gun to bend the USB cable out of the way of the modem.]] | ||
| + | [[File:Install modem with connector under pcb.jpg|none|thumb|Lift one side of the PCB to clear the modem's USB connector which should face upwards.]] | ||
| + | [[File:Installed modem.jpg|none|thumb|Firmly slide the modem into the bracket ensuring it reaches the bottom. (The slots in the bracket may require some filing.)]] | ||
| + | [[File:Attach gsm antenna pigtail to main antenna port.jpg|none|thumb|Attach the short GSM antenna pigtail to the main antenna port on the modem using your fingers or some needle-nose pliers.]] | ||
| + | [[File:Rf cable connected.jpg|none|thumb|Ensure the U.FL connector is seated correctly.]] | ||
| + | [[File:Connect usb cable to pc.jpg|none|thumb|Tuck the excess USB cable under the PCB and connect the USB header connector to the PC.]] | ||
| + | [[File:Connected usb cables.jpg|none|thumb|Ensure that the USB header connector is well seated and that the adjacent connectors have not been knocked out.]] | ||
Revision as of 19:04, 8 January 2019
Slide bracket to the rightThe DFNEXT observatories usually ship without modems as many of them are deployed with WiFi or Ethernet connectivity and different areas of the world require different modems.
If you wish to network your DFNEXT observatory via mobile broadband instead of WiFi or Ethernet you need to source a modem and request a modem installation care package from DFN Camera Help.
The recommended modems are the Sierra Wireless AirPrime MC Series MC7455 (for the Americas, Europe, the Middle East and Africa) and the MC7430 (for Asia Pacific including Australia).
Installation Steps
Once you have the modem, installation care package (containing the modem adaptor board, USB cable, modem bracket and screws) and a SIM card, you can install the modem by following the steps bellow.


File history
Click on a date/time to view the file as it appeared at that time.
| Date/Time | Thumbnail | Dimensions | User | Comment | |
|---|---|---|---|---|---|
| current | 18:59, 8 January 2019 | 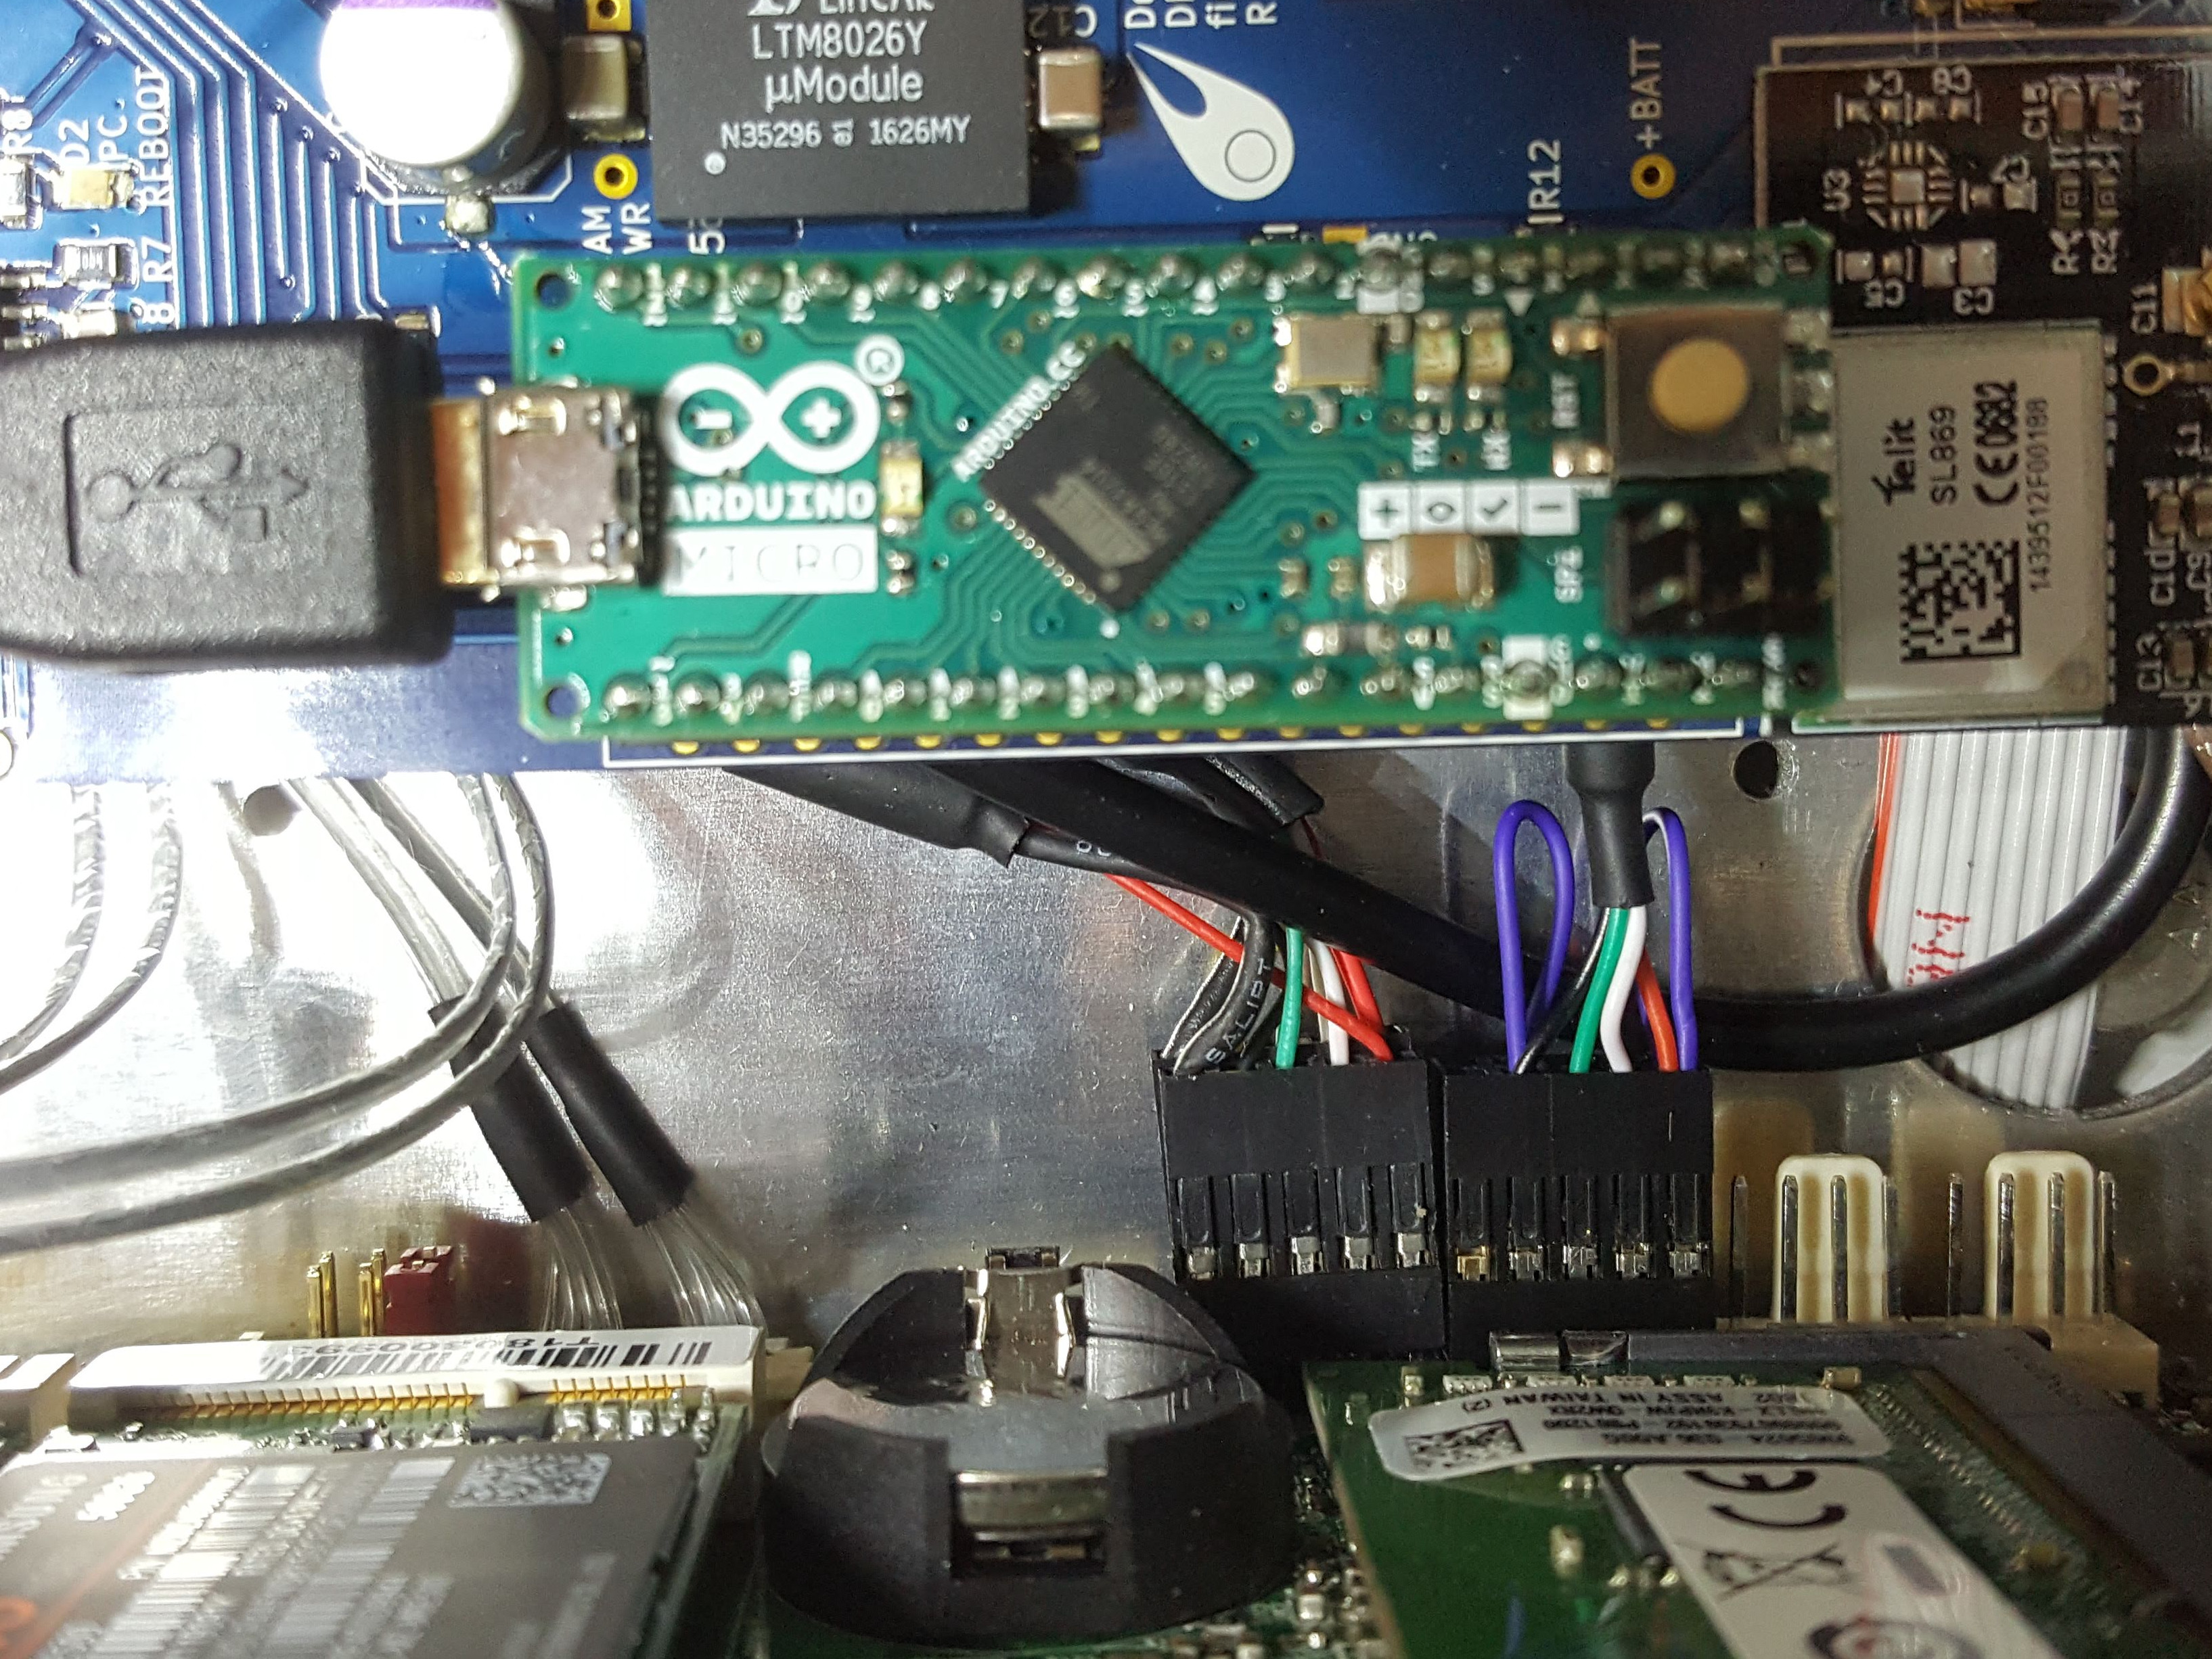 | 3,269 × 2,452 (1.77 MB) | Robert Howie (talk | contribs) |
- You cannot overwrite this file.
File usage
The following page links to this file: